Perfect Key Lime Pie Recipe | Easy Homemade Dessert
The Perfect Key Lime Pie Recipe: A Slice of Pure Sunshine – I’ll never forget the first time I ate real key lime pie.

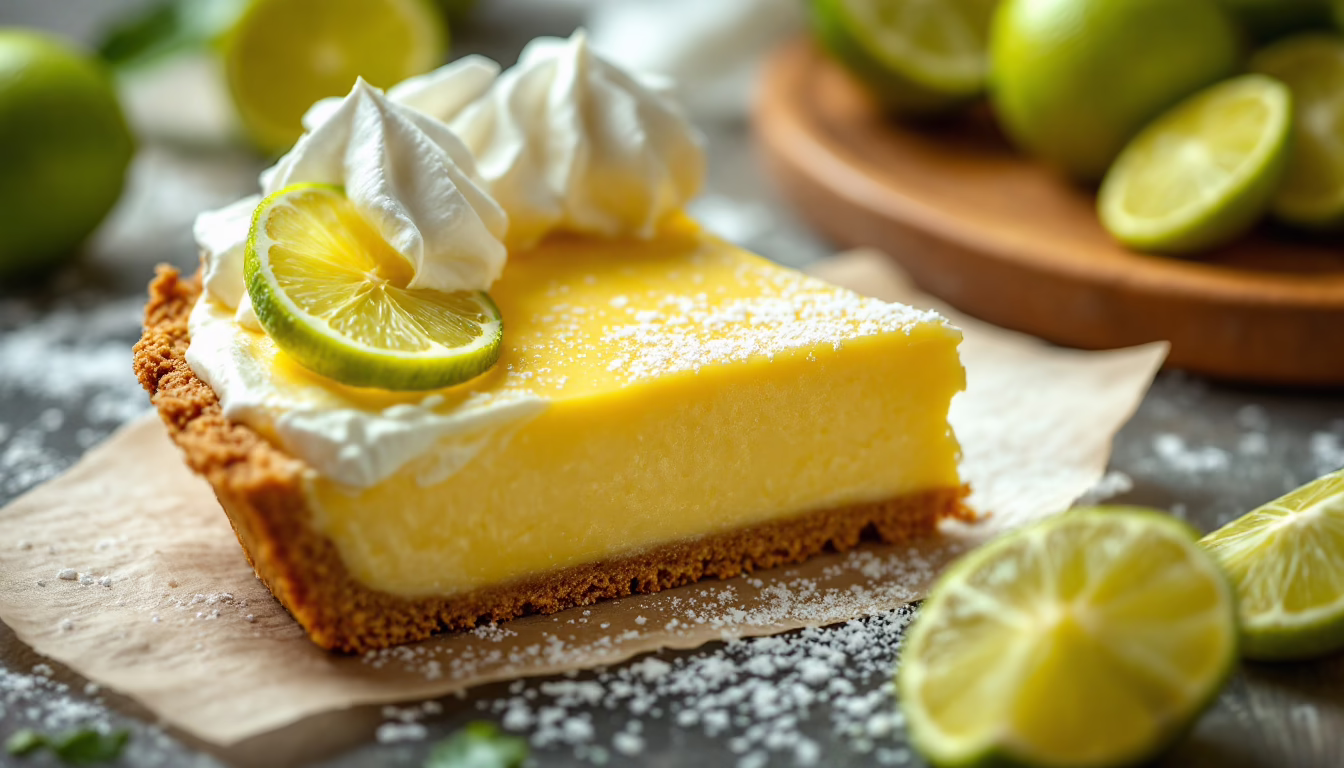
Key Lime Pie
Ingredients
- 300g digestive biscuits
- 150g butter, melted
- 400g condensed milk
- 3 egg yolks
- 4 limes (zest and juice)
- 300ml double cream
- 1 tbsp icing sugar
- Extra lime zest to serve
Instructions
- Heat the oven to 160C/fan 140C/gas 3. Whizz the biscuits to crumbs in a food processor (or put in a strong plastic bag and bash with a rolling pin). Mix with the melted butter and press into the base and up the sides of a 22cm loose-based tart tin. Bake in the oven for 10 minutes. Remove and cool.
- Put the egg yolks in a large bowl and whisk for a minute with electric beaters. Add the condensed milk and whisk for 3 minutes then add the zest and juice and whisk again for 3 minutes. Pour the filling into the cooled base then put back in the oven for 15 minutes. Cool then chill for at least 3 hours or overnight if you like.
- When you are ready to serve, carefully remove the pie from the tin and put on a serving plate. To decorate, softly whip together the cream and icing sugar. Dollop or pipe the cream onto the top of the pie and finish with extra lime zest.
Nutrition
I was twenty-three, sitting in a humid diner in Key West at 2 AM after a night of questionable decisions involving too many mojitos and a karaoke rendition of “Sweet Caroline” that I’m still recovering from.
The pie arrived—this pale green wedge that looked almost too perfect to be real—and I took one bite thinking it would be just another dessert.
Instead, I experienced what I can only describe as a religious awakening, if religion were made of condensed milk and citrus and pure, unadulterated joy.
The thing about key lime pie is that it’s deceptively simple.
Like really deceptively simple.
You look at this key lime pie recipe and think, “That’s it?
That’s the whole thing?” And yes, that’s the whole thing, but also no, because getting it right—getting that perfect balance of tart and sweet, that silky custard texture that holds its shape but melts on your tongue—requires understanding the alchemy of a few humble ingredients working together in perfect harmony.
I’ve made this pie probably fifty times since that revelatory moment in Florida (yes, I counted, and yes, I probably have a problem), and each time I’m amazed by how something so straightforward can taste so extraordinary.
The secret, I’ve learned through many trials and a few spectacular failures (including one memorable incident where I forgot the condensed milk was, you know, condensed, and added regular milk instead—don’t ask), is respecting each ingredient and understanding why it’s there.
This isn’t just throwing stuff in a pan and hoping for the best; it’s about creating something that tastes like sunshine trapped in pastry form.
Homemade Key Lime Pie Recipe: Tart, Sweet Perfection
Key lime pie has one of those origin stories that’s part fact, part legend, and entirely delicious.
The traditional tale goes that it was invented in the Florida Keys sometime in the 1850s by a cook named “Aunt Sally,” though honestly, I suspect there were probably dozens of Aunt Sallys (and Uncle Bobs and Cousin Marys) all figuring out what to do with those tiny, impossibly tart key limes that grow like weeds down there.
What we do know is that this key lime pie recipe was born out of necessity and ingenuity—the kind that happens when you live somewhere remote and hot, where fresh milk spoils in about five minutes but canned condensed milk keeps forever.
The original pies weren’t even baked; the acidity from the lime juice was enough to “cook” the egg yolks and thicken the condensed milk into something resembling custard.
It’s basically chemistry disguised as dessert, which appeals to my nerdy side in ways I probably shouldn’t admit.
The graham cracker crust came later (originally it was just pastry), and the addition of a baked step makes the filling more stable and gives it that perfect, sliceable texture we all know and love.
- Perfect Simple Pancakes Recipe – Easy & Delicious
- A Simple Apple Frangipan Tart Recipe That Tastes Like All-Day Baking
- Bread and Butter Pudding Recipe: Comfort in Every Bite
- Easy Banana Pancakes Recipe – Simple & Delicious
- Easy Rocky Road Fudge Recipe: Indulge in Chocolate Bliss
- Hot Chocolate Fudge Recipe – Cozy Winter Treat
But the heart of the recipe—that magical combination of condensed milk, egg yolks, and lime juice—remains beautifully, stubbornly unchanged.
Sometimes the old ways really are the best ways.
Essential Ingredients for the Best Key Lime Pie Recipe
Before we dive into the actual making of this key lime pie recipe, let’s talk ingredients—because while the list is short, each item is doing some serious heavy lifting.
You can’t just throw together any old crackers and call it a day (trust me, I tried using stale saltines once in college, and the results were… educational).
The Crust Foundation
Digestive biscuits (300g): Now, I know what you’re thinking—”digestive biscuits?
What is this, 1952?” But hear me out.
These humble cookies create the most incredible crust because they’re not too sweet, they hold together beautifully when mixed with butter, and they have this subtle honey-like flavor that plays perfectly with the tart filling.
If you can’t find digestive biscuits (and honestly, depending on where you live, they can be elusive), graham crackers work wonderfully too.
The key is using something that’s sturdy enough to hold up to the filling but not so assertive that it competes for attention.
Butter (150g, melted): This is your binding agent, the thing that turns a pile of crumbs into an actual crust.
Make sure it’s fully melted but not so hot that it melts your food processor (learned that one the hard way).
The butter also adds richness and helps create that satisfying crunch when you take your first bite.
The Magical Filling
Condensed milk (400g): This is where the magic happens.
Condensed milk isn’t just regular milk with some water taken out—it’s milk that’s been slowly cooked with sugar until it becomes this thick, almost caramel-like substance that’s incredibly sweet and has this unique, almost nutty flavor.
When it meets the acid from the lime juice, it thickens into custard without any additional cooking required.
It’s basically a miracle in a can.
Egg yolks (3 large): These add richness and help create that silky, custard-like texture.
Make sure they’re at room temperature—cold egg yolks don’t incorporate as smoothly and can leave you with a lumpy filling.
I learned to take my eggs out about an hour before I plan to bake, or if I’m feeling impatient (which is most of the time), I’ll put them in a bowl of warm water for about 10 minutes.
Limes (4 large): This is the star of the show, the reason we’re all here.
You want limes that feel heavy for their size and give slightly when you press them—those will have the most juice.
Don’t be tempted to use bottled lime juice; it lacks the brightness and complexity of fresh juice, and frankly, life’s too short for subpar key lime pie.
Step-by-Step Key Lime Pie Recipe Instructions
Now comes the fun part—actually making this key lime pie recipe.
I’m going to walk you through each step like I’m standing right there in your kitchen, because I’ve made every possible mistake with this recipe, and I want to save you from my pain (and from the disappointment of a soggy crust or grainy filling).
Preparing Your Crust
Preheat your oven to 160°C (140°C fan/gas mark 3).
This might seem low, but trust the process—we’re not trying to brown the crust aggressively; we just want to set it and give it a little structure.
Put your digestive biscuits in a food processor and pulse until they’re fine crumbs.
If you don’t have a food processor (been there), put the biscuits in a strong plastic bag, seal it well, and bash them with a rolling pin.
This is actually quite therapeutic, especially if you’ve had a rough day.
You want the crumbs to be fairly uniform—not powder, but not huge chunks either.
Think of the texture of coarse breadcrumbs.
Pour in your melted butter and pulse (or stir, if you’re doing this by hand) until the mixture looks like wet sand and holds together when you squeeze it.
Press this mixture firmly into the base and up the sides of a 22cm loose-based tart tin.
I cannot stress enough how important “firmly” is here—you want to really pack it down, especially at the corners where the base meets the sides, or you’ll end up with a crust that falls apart when you try to slice it.
Bake for 10 minutes, then remove and let it cool completely.
I know it’s tempting to rush this step, but a hot crust will scramble your filling faster than you can say “key lime pie recipe.”
Creating the Perfect Filling
While your crust is cooling, make your filling.
Put your 3 egg yolks in a large bowl and whisk them with electric beaters for about a minute.
They should get slightly paler and a bit thicker—you’re not trying to make meringue here, just incorporating some air to help create a smooth texture.
Add the condensed milk and whisk for 3 minutes.
This might seem excessive, but this whisking is crucial—it’s incorporating air into the mixture and ensuring everything is completely smooth.
Your arm might start to ache (electric beaters are your friend here), but stick with it.
Now for the lime: zest all 4 limes first (you’ll need some for garnish later), then juice them.
You should get about 120ml of juice, give or take.
Add both the zest and juice to your mixture and whisk again for 3 minutes.
You’ll notice the mixture thickening slightly as the acid starts working its magic on the condensed milk and egg yolks.
Pour this filling into your cooled crust—it should come almost to the top of the crust sides.
Return to the oven for 15 minutes.
The filling should be just set but still have a slight wobble in the center when you gently shake the pan.
The Final Steps
Cool the pie completely at room temperature, then chill for at least 3 hours, though overnight is even better.
This isn’t just about temperature—the filling continues to set as it chills, and the flavors meld together beautifully.
When you’re ready to serve, carefully remove the pie from the tin.
This is always a slightly nerve-wracking moment for me—will it hold together?
Will the crust crumble?
(Usually yes to the first, occasionally yes to the second, but that’s what makes it charming.)
Pro Tips for Key Lime Pie Recipe Success
After making this key lime pie recipe more times than I care to admit, I’ve learned a few tricks that make the difference between a good pie and a great one.
These aren’t revolutionary techniques—just small adjustments that add up to significantly better results.
Temperature Control is Everything
Room temperature ingredients mix more smoothly and create a silkier filling.
I keep a mental note to take my eggs out of the fridge about an hour before I start baking, or I’ll place them in a bowl of warm (not hot) water for 10 minutes if I’m feeling impatient.
The Zesting Technique
When zesting your limes, only zest the green part of the peel—the white pith underneath is bitter and will throw off the flavor balance of your key lime pie recipe.
I use a microplane grater and work in light strokes, rotating the lime frequently to avoid hitting the pith.
Juice Extraction Maximization
To get the most juice from your limes, roll them firmly on the counter while pressing down before cutting them.
This breaks down the internal membranes and makes the juice flow more freely.
Room temperature limes also yield more juice than cold ones.
Testing for Doneness
The filling is done when it’s set around the edges but still has a very slight wobble in the center—think barely-set Jell-O.
It will continue to firm up as it cools.
If you overbake it, the texture becomes grainy rather than silky.
Storage and Serving
This pie actually improves after a day in the refrigerator—the flavors meld and the texture becomes even more luxurious.
Cover it loosely with plastic wrap to prevent it from absorbing other refrigerator flavors.
Creative Variations on the Classic Key Lime Pie Recipe
While I’m usually a purist when it comes to classic recipes (don’t mess with perfection, right?), I’ve discovered a few variations that honor the spirit of the original while adding some delicious twists.
These aren’t radical departures—just gentle explorations that might appeal to different tastes or dietary needs.
The Coconut Twist
Replace half the digestive biscuits with coconut cookies, or add 2 tablespoons of unsweetened shredded coconut to your crust mixture.
The coconut adds a tropical note that plays beautifully with the lime while maintaining the pie’s essential character.
Individual Portion Perfect
Make this key lime pie recipe in individual ramekins or small tart pans—perfect for dinner parties or when you want to look fancy without additional effort.
Just reduce the baking time for both the crust (about 8 minutes) and filling (about 10-12 minutes).
The Ginger Enhancement
Add a tablespoon of finely minced crystallized ginger to your filling mixture.
The warm spice complements the tartness of the lime and adds an unexpected depth of flavor that never fails to surprise people.
Make-Ahead Marvel
This pie freezes beautifully for up to two months.
Wrap it well in plastic wrap and aluminum foil, then thaw it overnight in the refrigerator before serving.
The texture remains remarkably close to fresh, making it perfect for advance party planning.
What to Expect: Realistic Outcomes and Final Thoughts
Here’s what I want you to know about making this key lime pie recipe: it’s going to be delicious, but it might not be Instagram-perfect the first time, and that’s completely okay.
My first attempt had a slightly soggy bottom (technical term: I didn’t press the crust firmly enough), and the filling had a few small lumps (I rushed the whisking).
But you know what?
It still tasted like sunshine in pie form, and everyone who ate it asked for the recipe.
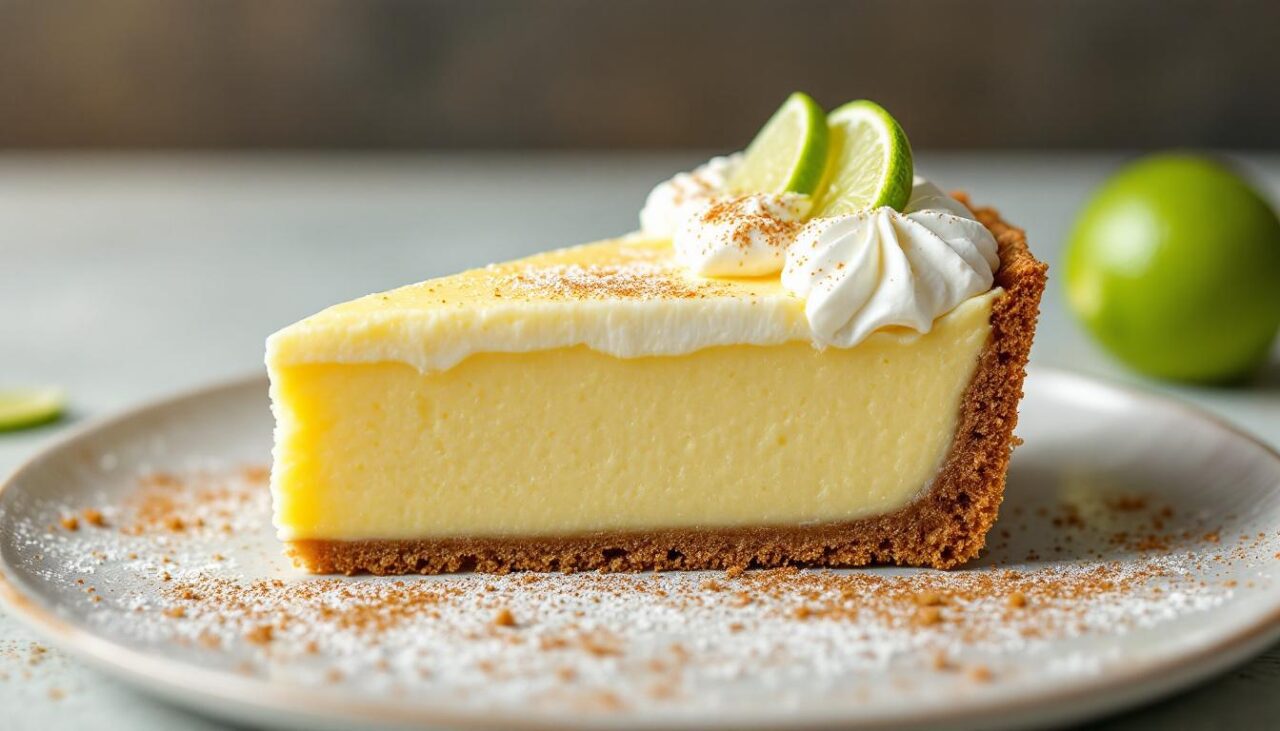
The beauty of this key lime pie recipe lies not in its complexity but in its simplicity and the quality of the basic ingredients working together.
When you take that first bite—the crunch of the buttery crust giving way to the silky, tart-sweet filling—you’ll understand why this dessert has remained virtually unchanged for over a century.
It’s perfect because it’s simple, and it’s simple because it’s perfect.
Don’t stress about getting perfectly clean slices (though a sharp knife dipped in warm water between cuts helps), or worry if your whipped cream doesn’t pipe in perfect rosettes.
The most important thing is that you’re creating something from scratch that brings joy to people—including yourself.
And trust me, once you master this key lime pie recipe, you’ll find yourself making it for every occasion that calls for something special, and several occasions that don’t.
So go forth and make pie.
Your kitchen will smell like citrus and butter, your house will fill with the anticipation of something wonderful cooling in the refrigerator, and you’ll have created something that tastes exactly like happiness should.
Key Lime Pie Recipe Ingredients:
- 300g digestive biscuits
- 150g butter, melted
- 400g condensed milk
- 3 large egg yolks
- 4 large limes (zested and juiced)
- 300ml double cream
- 1 tablespoon icing sugar
- Extra lime zest for serving
Instructions:
- Preheat oven to 160°C/fan 140°C/gas 3
- Process biscuits to crumbs, mix with melted butter
- Press into 22cm tart tin, bake 10 minutes, cool
- Whisk egg yolks 1 minute, add condensed milk, whisk 3 minutes
- Add lime zest and juice, whisk 3 minutes
- Pour into cooled crust, bake 15 minutes
- Cool completely, chill 3+ hours
- Serve with whipped cream and lime zest