Perfect Matar-Paneer Recipe | Easy Indian Comfort Food
The Perfect Matar-Paneer Recipe: A Weeknight Love Story – There’s this moment every Tuesday around 6:47 PM when I stand in my kitchen, staring into the refrigerator like it holds the secrets of the universe, when really all I need is dinner inspiration.

Matar Paneer
Ingredients
- 1 tbls Sunflower Oil
- 225g Paneer
- 2 Ginger (pieces)
- 1 tsp Cumin
- 1 tsp Turmeric
- 1 tsp Ground Coriander
- 1 Green Chilli
- 4 large Tomatoes
- 150g Peas
- 1 tsp Garam Masala
- Small bunch Coriander leaves
- Naan Bread to serve
Instructions
- Heat the oil in a frying pan over high heat until it's shimmering hot. Add the paneer, then turn the heat down a little. Fry until it starts to brown at the edges, then turn it over and brown on each side u2013 the paneer will brown faster than you think, so don't walk away. Remove the paneer from the pan and drain on kitchen paper.
- Put the ginger, cumin, turmeric, ground coriander and chilli in the pan, and fry everything for 1 min.
- Add the tomatoes, mashing them with the back of a spoon and simmer everything for 5 mins until the sauce smells fragrant. Add a splash of water if it's too thick. Season well.
- Add the peas and simmer for a further 2 mins, then stir in the paneer and sprinkle over the garam masala. Divide between two bowls, top with coriander leaves and serve with naan bread, roti or rice.
Nutrition
Last week, during one of these existential fridge-gazing sessions, I spotted a container of paneer I’d bought with grand weekend cooking plans (you know how it goes) and a bag of frozen peas that had been giving me guilty looks for approximately three weeks.
That’s when it hit me — matar-paneer recipe to the rescue.
Now, I’ll be honest with you: I used to be intimidated by Indian cooking.
There’s something about the beautiful complexity of flavors, the seemingly endless spice combinations, and the fact that my attempts at naan looked more like sad, flat pancakes than proper bread.
But here’s what I’ve learned after years of kitchen adventures and a fair share of disasters — some of the most soul-satisfying dishes are surprisingly straightforward.
This matar-paneer recipe is one of those miraculous combinations where simple technique meets incredible flavor, and suddenly you’re spooning creamy, spiced perfection over rice while wondering why you ever thought cooking Indian food was difficult.
The beauty of this dish lies not just in its accessibility (we’re talking about 20 minutes from start to finish), but in how it transforms humble ingredients — cubes of paneer, a handful of peas, and a few basic spices — into something that tastes like it simmered lovingly for hours.
It’s comfort food that happens to be vegetarian, weeknight-friendly, and impressive enough to serve to company without breaking a sweat.
Golden Paneer and Peas: My Go-To Matar-Paneer Recipe
Matar-paneer holds a special place in Indian cuisine as one of those dishes that perfectly exemplifies the beauty of vegetarian cooking.
Literally translating to “peas and cottage cheese,” this North Indian classic has been warming hearts and filling bellies for generations.
The dish originated in the Punjab region, where dairy farming flourished and fresh paneer was readily available, while green peas provided a sweet counterpoint to the rich, creamy cheese.
What makes this matar-paneer recipe so enduring is its perfect balance — the mild, creamy paneer absorbs the aromatic spices while the peas add bursts of sweetness and color.
It’s the kind of dish that manages to be both elegant and homey, sophisticated yet approachable.
In Indian households, it’s often the recipe that gets passed down from mother to daughter, each cook adding their own subtle variations — a little extra garam masala here, a touch more ginger there.
The traditional preparation involves creating a base of onions, tomatoes, and spices called a masala, then gently folding in the paneer and peas so everything melds together without the delicate cheese falling apart.
It’s a technique that speaks to the thoughtful nature of Indian cooking, where each ingredient is treated with respect and given space to shine.
- Cozy Nights and Smoky Lentil Chili with Squash Recipe
- Dal-Fry Recipe: How to Make the Perfect Dal-Fry at Home
- Easy Spanish Tortilla Recipe | Authentic & Simple
- Tahini Lentils Recipe: Easy Weeknight Dinner
- Roasted Eggplant With Tahini, Pine Nuts, and Lentils Recipe
- Easy Spinach & Ricotta Cannelloni Recipe
This particular version streamlines the process without sacrificing any of the essential flavors that make matar-paneer such a beloved comfort food.
Essential Ingredients for Your Matar-Paneer Recipe
Before we dive into the cooking process, let’s talk about what you’ll need to create this aromatic masterpiece.
The ingredient list is refreshingly short, but each component plays a crucial role in building those complex, layered flavors that make this matar-paneer recipe so satisfying.
The Star Players
- 1 tablespoon sunflower oil (or any neutral cooking oil)
- 225g (8 oz) paneer, cut into bite-sized cubes
- 2 pieces fresh ginger, minced (about 1 tablespoon)
- 1 teaspoon ground cumin
- 1 teaspoon turmeric
- 1 teaspoon ground coriander
- 1 green chili, finely chopped (adjust to taste)
- 4 large tomatoes, roughly chopped
- 150g (1 cup) peas (fresh or frozen work perfectly)
- 1 teaspoon garam masala
- Small bunch fresh coriander (cilantro), chopped for garnish
- Naan bread, roti, or rice for serving
- Salt to taste
A quick note about paneer — if you can’t find it at your regular grocery store, check the international aisle or visit an Indian market.
In a pinch, you can substitute firm tofu, though the flavor will be different.
Fresh paneer has a mild, slightly tangy taste and a texture that’s somewhere between mozzarella and firm ricotta.
It’s worth seeking out the real thing for the most authentic matar-paneer recipe experience.
Step-by-Step Instructions for Perfect Matar-Paneer
Now comes the fun part — actually making this aromatic, comforting dish.
The key to a successful matar-paneer recipe lies in building layers of flavor and treating the paneer gently so it stays intact and creamy.
Step 1: Golden Paneer Perfection
Heat your tablespoon of oil in a large frying pan over high heat until it shimmers — this usually takes about 1-2 minutes.
The oil should be hot enough that a small piece of paneer sizzles immediately when it hits the pan.
Add your paneer cubes in a single layer (work in batches if necessary to avoid overcrowding), then immediately reduce the heat to medium-high.
Here’s where patience becomes your friend: let the paneer fry undisturbed for about 2-3 minutes until the bottom edges start turning golden brown.
The temptation to move them around is real, but resist!
Once you see those beautiful golden edges forming, gently flip each cube using a spatula or tongs.
Fry for another 2-3 minutes until all sides are lightly browned and gorgeous.
The paneer browns faster than you’d expect, so stay close — this isn’t the time to start loading the dishwasher or checking your phone.
Once your paneer is perfectly golden, transfer it to a plate lined with paper towels to drain any excess oil.
This browning step isn’t just about aesthetics (though the golden cubes are pretty) — it adds a subtle nutty flavor and helps the paneer hold its shape when we add it back to the sauce later.
Step 2: Building the Aromatic Base
In the same pan (don’t clean it — those browned bits are flavor gold), add your minced ginger, cumin, turmeric, ground coriander, and chopped green chili.
Reduce the heat to medium and fry everything together for exactly 1 minute, stirring constantly.
You’ll know it’s ready when the kitchen fills with an absolutely intoxicating aroma and the spices become fragrant but not burnt — burnt spices will make your matar-paneer recipe bitter, and nobody wants that.
This technique, called tempering or “tadka” in Indian cooking, awakens the essential oils in the spices and creates the foundation for all the flavors that follow.
The oil should sizzle gently around the spices, and you might notice the turmeric turning the oil a beautiful golden color.
Step 3: Tomato Magic
Add your chopped tomatoes to the pan and immediately start mashing them with the back of a wooden spoon or spatula.
Don’t be gentle here — really break them down so they release their juices and start forming a chunky sauce.
Let this mixture simmer for 5 minutes, stirring occasionally, until the tomatoes have broken down completely and the sauce smells absolutely incredible.
If your sauce looks too thick or starts sticking to the bottom of the pan, add a splash of water — just enough to loosen things up.
The goal is a thick, fragrant sauce that coats the back of a spoon but isn’t paste-like.
Season generously with salt at this point; the tomatoes need it to really shine.
Step 4: Bringing It All Together
Add your peas to the tomato mixture and let them simmer for 2 minutes.
If you’re using frozen peas (which I often do because they’re convenient and perfectly sweet), they’ll defrost quickly and become tender.
Fresh peas might need an extra minute or two.
Now for the moment we’ve been building toward — gently fold in your golden paneer cubes and sprinkle the garam masala over everything.
Stir very carefully to avoid breaking the paneer, just until everything is well combined and heated through.
The paneer should be warmed but not cooked to death — remember, it’s already perfectly cooked from the browning step.
Taste and adjust seasoning as needed.
Sometimes I add a pinch more salt, sometimes a little extra garam masala if I’m feeling bold.
This is your matar-paneer recipe, so make it taste exactly how you want it.
Pro Tips for Matar-Paneer Recipe Success
After making this dish more times than I can count (and learning from a few less-than-perfect attempts), I’ve gathered some insights that make the difference between good matar-paneer and absolutely spectacular matar-paneer.
Temperature Control is Everything
The biggest mistake I see people make with this matar-paneer recipe is cooking everything on high heat throughout the entire process.
Yes, you want high heat for browning the paneer, but once you add the spices, medium heat is your friend.
High heat will burn the delicate spices and create bitter flavors that no amount of garam masala can fix.
Fresh vs. Frozen Peas
Both work beautifully in this recipe, but they require slightly different timing.
Frozen peas (which I actually prefer for their consistent sweetness) need just 2 minutes to heat through, while fresh peas might need 3-4 minutes depending on their size and age.
Overcooked peas turn mushy and lose their vibrant color, so err on the side of slightly underdone — they’ll continue cooking in the residual heat.
The Paneer Question
If your paneer seems too firm or squeaky, try soaking the cubes in warm water for 10 minutes before cooking.
This softens them slightly and makes them more tender in the final dish.
Also, don’t skip the browning step — it might seem like extra work, but it prevents the paneer from falling apart when you fold it into the sauce.
Spice Level Adjustments
This recipe creates a mild to medium heat level, perfect for most palates.
If you want more heat, add an extra green chili or a pinch of cayenne pepper with the other spices.
For a milder version, remove the seeds from your green chili or skip it entirely — the dish will still be flavorful and aromatic.
Make-Ahead Magic
This matar-paneer recipe actually improves with time.
You can make the entire dish a day ahead and gently reheat it — the flavors meld and deepen overnight.
Just add a splash of water when reheating if the sauce has thickened too much.
Creative Variations to Make This Recipe Your Own
One of the things I love most about this matar-paneer recipe is how adaptable it is.
Once you’ve mastered the basic technique, there are countless ways to make it uniquely yours.
The Creamy Dream Version
For special occasions or when you want to feel particularly indulgent, stir in 2-3 tablespoons of heavy cream or coconut cream just before serving.
This creates an incredibly rich, restaurant-style sauce that’s absolutely divine.
I sometimes add a tablespoon of cashew paste (just blend cashews with a little water) for extra richness without dairy.
Protein Power-Up
While traditional matar-paneer is vegetarian, you can easily add protein by including some cooked chickpeas along with the peas, or stirring in some cooked chicken or lamb if you’re not strictly vegetarian.
The spice blend works beautifully with these additions.
Veggie Boost
Carrots, bell peppers, or cauliflower make excellent additions to this recipe.
Cut them into small pieces and add them with the tomatoes so they have time to cook through.
I particularly love adding diced bell peppers for extra color and sweetness.
Regional Twists
Some regions add a pinch of fenugreek leaves (kasoori methi) at the end for an extra layer of flavor, while others include a bay leaf with the initial spice tempering.
These small additions can transform the dish and make it feel completely new.
What to Expect: Realistic Results and Final Thoughts
Let’s be real about what you’re going to get when you make this matar-paneer recipe — and what you might not get on your first try.
This isn’t going to taste exactly like your favorite Indian restaurant’s version (they likely use different spice blends and cooking techniques), but it’s going to be something equally wonderful in its own right: homemade, aromatic, and deeply satisfying.
Your first attempt might not be perfect, and that’s completely okay.
Maybe your paneer breaks apart a little (mine still does sometimes), or your sauce is thicker or thinner than you expected.
These aren’t failures — they’re learning experiences that make you a better cook.
The beauty of this dish is that even when it’s not picture-perfect, it still tastes incredible.
What you can absolutely expect is a kitchen filled with the most amazing aromas while you cook, and a dish that tastes complex and sophisticated despite requiring just 20 minutes of active cooking time.
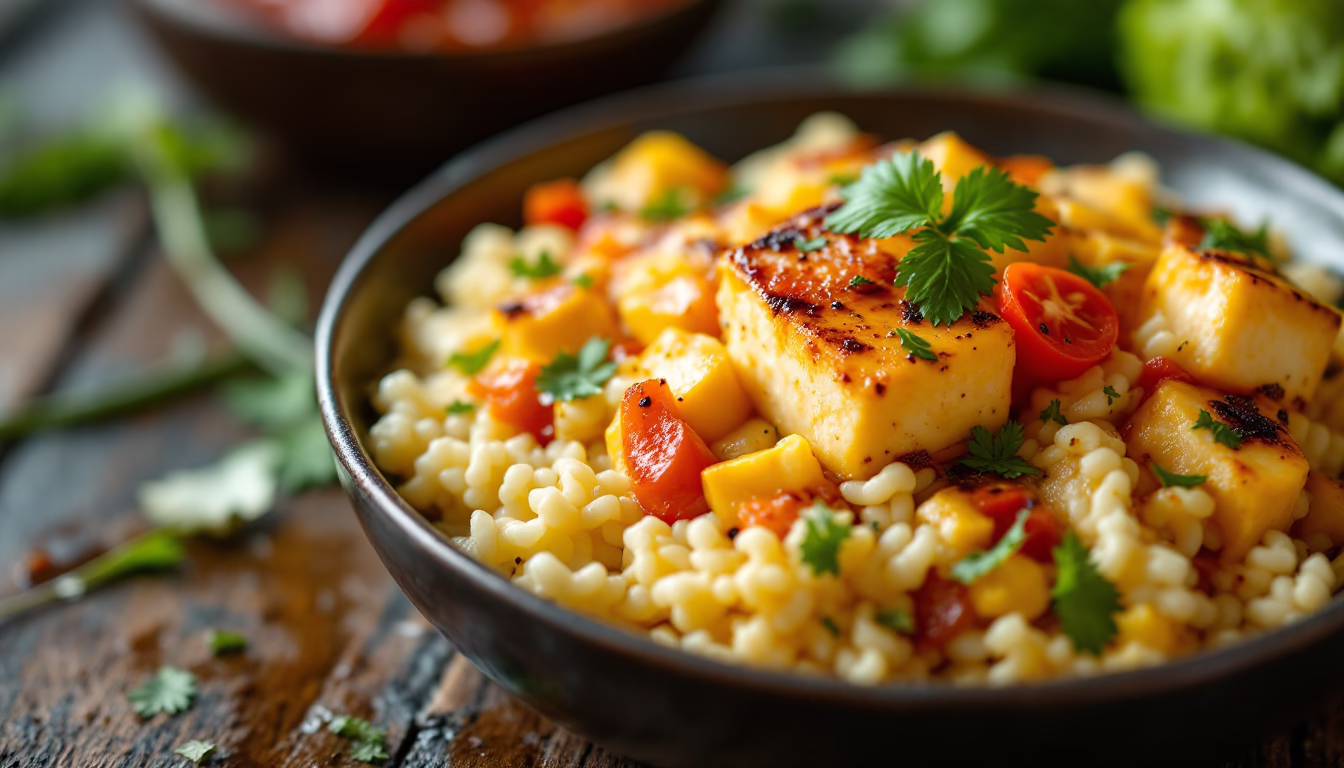
You’ll have tender, golden paneer nestled in a fragrant tomato-based sauce with sweet peas adding pops of color and freshness.
Served over rice or with warm naan, it’s the kind of meal that makes you close your eyes on the first bite and think, “I made this?”
The leftovers (if there are any) are arguably even better the next day, making this matar-paneer recipe perfect for meal prep or those nights when you want something comforting without any fuss.
And here’s perhaps the best part — once you’ve made this a few times, you’ll find yourself improvising and adjusting based on what you have in your pantry, turning a simple recipe into your own signature dish.
So go ahead, give it a try.
Your Tuesday night self will thank you, and you might just discover that Indian cooking isn’t as intimidating as it seems — sometimes it’s just about good ingredients, a little technique, and the confidence to trust your taste buds.